There’s nothing quite like a picnic to celebrate good weather, friends, and food. But when you’ve prepared a delicious, warm dish, it’s important that it doesn’t turn cold before everyone gets a chance to dig in. Wondering how to keep food warm for a picnic? We’ve got some top tips to ensure your feast remains at the perfect temperature.
Preheat Your Containers
When it comes to storing warm or hot dishes in containers, the simple yet effective technique of preheating your containers can significantly impact the quality and freshness of your food. This method involves using boiling water to warm the containers before placing your food inside. In this comprehensive guide, we will take you through the process step by step, provide a checklist of supplies, discuss the benefits of preheating, and offer expert tips for maximizing the effectiveness of this method.
Supplies Needed
Before you begin the preheating process, it’s essential to ensure you have all the necessary supplies ready to go:
- Containers: Select the containers you plan to use for storing your warm dishes. These could include glass or plastic containers with airtight lids;
- Kettle or Pot: You’ll need a kettle or a pot large enough to hold the amount of water required to fill your containers;
- Timer: Have a timer or a stopwatch handy to accurately monitor the preheating time;
- Oven Mitts or Towel: To protect your hands from hot containers and water.
Step-by-Step Preheating Process
Now, let’s break down the preheating process into detailed steps to ensure success:
| Step | Description |
| 1. | Before you start, gather all the supplies mentioned above. Having everything ready beforehand will streamline the process and prevent unnecessary delays. |
| 2. | Fill your kettle or pot with an adequate amount of water. Ensure you have enough water to fill the containers you intend to use. Place the kettle or pot on the stove and set it to high heat. Allow the water to come to a rolling boil. |
| 3. | While the water is boiling, prepare your containers by ensuring they are clean and dry. If your containers have been stored in a cold place, such as the refrigerator, allow them to come to room temperature before preheating to avoid sudden temperature shocks. |
| 4. | Carefully and slowly pour the boiling water into the containers. Fill each container to about 1/3 full or enough to cover the bottom. This hot water will serve to warm up the container and create an environment that helps retain heat. |
| 5. | Quickly seal each container with its respective lid or cover. It’s crucial to do this promptly to trap the heat inside. Set a timer for a few minutes, typically 3-5 minutes, depending on the container’s size and thickness. This waiting period allows the container to absorb the heat and become adequately preheated. |
| 6. | After the designated waiting time, carefully empty the hot water from the containers. Take precautions to prevent burns, as both the containers and water will be hot. You can use a sink or a separate container to safely discard the hot water. |
| 7. | Immediately place your warm dishes into the preheated containers. This step should be done promptly to maximize heat retention. Seal the containers again to create an airtight environment that will help retain the food’s temperature for an extended period. |
Benefits of Preheating Containers
Preheating your containers offers numerous advantages when it comes to food storage:
- Enhanced Heat Retention: The warm container helps to keep your food hotter for a more extended period, reducing the risk of rapid cooling;
- Minimized Temperature Shock: Placing hot food in a cold container can cause temperature shock, potentially affecting the food’s quality. Preheating prevents this issue;
- Extended Freshness: The heat-retaining environment inside the preheated container can help maintain the food’s flavor, texture, and overall quality;
- Convenience: Preheating containers is a straightforward process that doesn’t require any special equipment. It is a convenient and accessible method for keeping your dishes warm and fresh;
- Reduced Bacterial Growth: By maintaining a higher initial temperature, preheating containers can slow down bacterial growth in your stored food, improving its safety.
Expert Tips for Preheating Success
To make the most of the preheating process, consider these expert tips:
- Use Insulated Containers: If you have access to insulated containers, they can be even more effective at retaining heat;
- Match Container Size: Try to match the container size to the amount of food you’re storing. A smaller container with less empty space will help maintain heat better;
- Reheat Before Serving: If you plan to serve the food shortly after storage, consider reheating it briefly in a microwave or oven before serving to bring it back to the desired serving temperature;
- Label and Date: Always label your containers with the date of storage to keep track of freshness. Use food-safe labels or markers;
- Avoid Overcrowding: Overcrowding the container with food can prevent proper heat distribution. Leave some space to allow heat to circulate;
- Practice Food Safety: Remember to follow food safety guidelines regarding temperature and storage times, even when preheating containers. This method helps maintain heat but should not replace food safety precautions.
Thermal Bags and Insulated Carriers
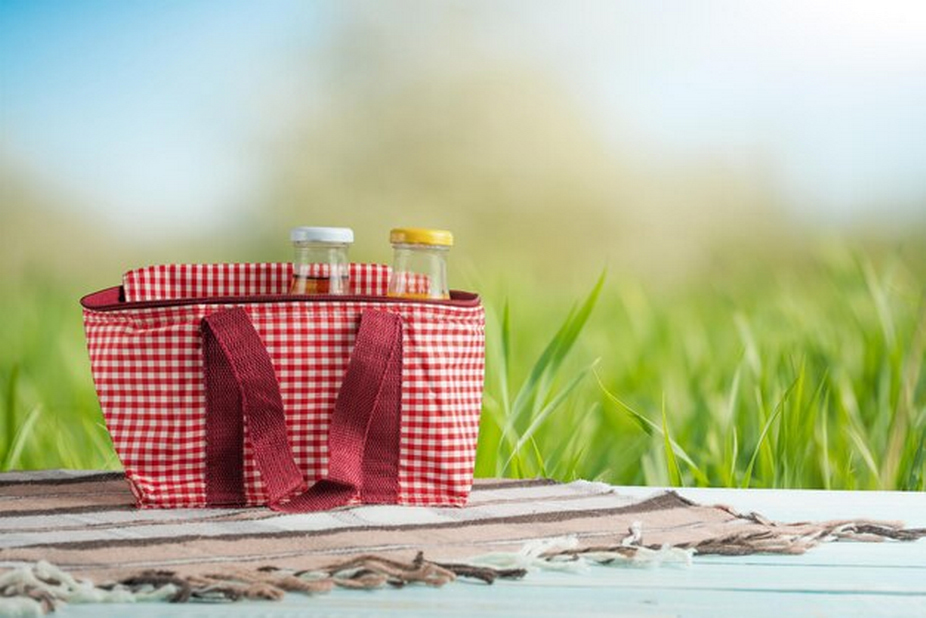
Thermal bags, also known as insulated bags or cooler bags, are specially designed to retain heat and keep food warm. They are constructed with insulating materials that create a barrier against the external temperature, whether hot or cold. This insulation helps to slow down heat transfer, ensuring that your warm dishes stay warmer for longer periods.
Key Features and Benefits:
- Heat Retention: Thermal bags have insulating layers that trap heat inside, preserving the warmth of your food items;
- Versatility: These bags come in various sizes and shapes, making them suitable for packing different dishes. You can pack multiple containers or dishes in larger thermal bags, which is ideal for picnics with family and friends;
- Portability: Thermal bags often come with sturdy handles or shoulder straps, making them easy to carry to your picnic location;
- Durability: Most thermal bags are designed to be durable and long-lasting, ensuring they can be used for multiple picnics over time;
- Easy to Clean: Many thermal bags have wipe-clean or machine-washable interiors, making cleanup a breeze after your picnic adventure.
Aluminum Foil
Aluminum foil is a versatile kitchen tool that can do more than just wrap sandwiches; it can also effectively retain heat when you need to keep your picnic food warm. Here’s a detailed guide on using aluminum foil to maintain the temperature of your dishes:
Using Aluminum Foil for Heat Retention:
- Prepare a Large Piece of Foil: Start by laying out a generous piece of aluminum foil on a flat surface. Ensure that it’s large enough to fully enclose your dish with some extra room for folding;
- Position Your Dish: Place your warm dish containing the picnic food at the center of the aluminum foil. Make sure it’s well-centered to ensure even heat retention;
- Fold and Seal Tightly: Gently fold the sides of the aluminum foil over the top of your dish, creating a snug and secure seal. This fold will trap the heat inside and help maintain the warmth of your food;
- Wrap in a Towel or Cloth (Optional): For extra insulation and heat retention, consider wrapping the foil-wrapped food again in a towel or cloth. This additional layer acts as an insulator, further preventing heat loss.
Hot Water Bottles or Gel Packs
Hot water bottles and gel packs are designed to provide heat retention and can be valuable companions for picnics. They are easy to use and can help keep your food warm for an extended period.
Usage Instructions:
- Preheat as Directed: Before you head out for your picnic, follow the manufacturer’s instructions to preheat your hot water bottle or microwave the gel pack. Proper preheating ensures that they will release a consistent and safe amount of heat;
- Placement: Once heated, place the hot water bottle or gel pack at the bottom of your picnic basket or container. This strategic placement serves as a heat source for your dishes, helping to maintain their temperature;
- Layering: Position your food containers or dishes on top of the hot water bottle or gel pack. Ensure that they are in direct contact with the heat source, as this will maximize the heat transfer and keep your food warm.
Layer with Towels or Blankets
Using towels or blankets as insulation layers is a clever and cost-effective way to maintain the warmth of your picnic food while also ensuring a safe and spill-free dining experience. Let’s explore the details of how to effectively employ these insulating materials:
- Prepare Your Warm Dishes: Start by placing your warm dishes or containers inside your picnic basket or container. Ensure that your food items are well-prepared and sealed to minimize heat loss;
- Add Insulating Layers: Once your dishes are in place, layer towels or blankets over them. These materials act as insulators, helping to trap heat and maintain the temperature of your food. You can use any clean, dry towels or blankets you have on hand;
- Secure the Layers: Be sure to tuck the towels or blankets around the dishes securely. This not only provides insulation but also helps prevent any accidental spills during transportation.
Invest in Quality Food Thermoses
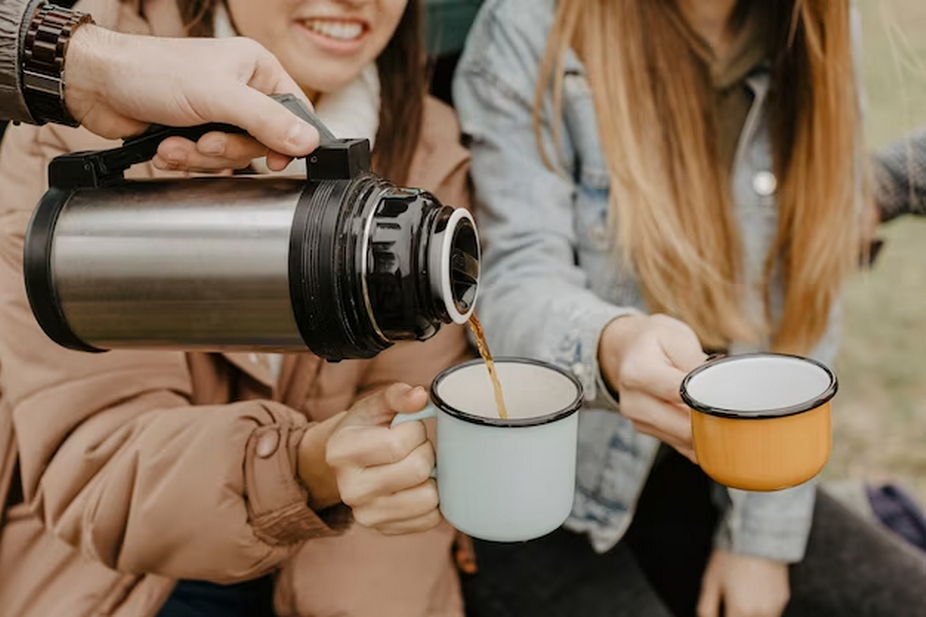
Investing in quality food thermoses is a smart choice when you want to keep your picnic dishes warm, especially for soups, stews, or pasta. These specialized containers are designed to maintain the temperature of your food for an extended period.
Food thermoses are designed with double-walled insulation and airtight seals to keep food hot for hours. They come in various sizes and shapes to accommodate different meal portions.
Usage Instructions:
- Preheat the Thermos: To ensure maximum heat retention, preheat the food thermos by pouring hot water into it for a few minutes. This step warms up the interior and creates an ideal environment for your warm dish;
- Empty the Thermos: After preheating, carefully empty the hot water from the thermos. Be cautious, as the water may be scalding hot. This step ensures that your food won’t be diluted by any remaining water;
- Add Your Warm Dish: Immediately place your warm soup, stew, pasta, or any other hot food into the preheated thermos. Seal it tightly to create an airtight environment, which will help maintain the temperature of your food.
Conclusion
A picnic is always more delightful when the food is warm and delicious. By using these tried and tested techniques, you’ll be well-equipped to keep food warm for a picnic. So the next time you’re packing up for an outdoor feast, remember these sizzling secrets and enjoy your meal just the way you intended!
FAQs
Q: How long will these methods keep food warm?
A: Most of these methods will keep food warm for a picnic for about 2-4 hours, depending on external conditions. Using a combination of techniques will extend this time.
Q: Can I use heating packs instead of hot water bottles or gel packs?
A: Absolutely! Heating packs can be a convenient choice, especially the ones you can activate on-the-go.
Q: Is it safe to keep food warm for long durations during a picnic?
A: While these tips focus on how to keep food warm for a picnic, it’s crucial to ensure food safety. Warm food should not be left out for more than 2 hours (or 1 hour if the temperature is above 90°F). If unsure, it’s best to consume the food within this timeframe or discard it.
Q: Does the container material matter when trying to keep food warm for a picnic?
A: Yes, some materials retain heat better than others. Glass and ceramic containers generally maintain warmth better than plastic ones. When thinking about how to keep picnic food warm, ensure you’re using the best materials available.
Q: What dishes are best for keeping warm during a picnic?
A: Foods with a lot of moisture, like stews, soups, or casseroles, tend to retain heat longer. However, with the right techniques, you can keep most foods warm for your picnic.